This is a comprehensive post describing step-by-step how I rebuild the Math2IT site using Wordpress as the backend (for the authors writing the blog posts) and displaying the content via Gatsby (a Static Site Generator engine) via GraphQL. The styles are the same as in version 3, but instead of Bootstrap this time I am using TailwindCSS.
The final source code: https://github.com/dinhanhthi/wordpress-gatsby
Before you read:
- I am not a professional developer of Wordpress or Gatsby or GraphQL or React. I am just a learner who knows what parts I need to get the job done. I learn when I build.
- I work with macOS, the steps you read in this post may differ on Windows and Linux. You can edit the post or let me know if there are differences. Thanks a lot!
- Some Github URLs may be inaccessible, as I have not yet changed the visibility of the corresponding repositories to public. Please email me or wait until the URLs are public.
- I'll show you how to build the basic "backbone" of the website. As for the styles, you'll have to figure it out for yourself.
- The codes and instructions in this post depend heavily on the versions of the things being mentioned. If you have a different version, please check the migration instruction for that version before proceeding.
The versions of things I use in this post
- Wordpress: version 5 or 6 (I use mainly 6).
- Gatsby: version 4.21.0 (Gatsby CLI: 4.20.0)
- Local: version 6.4.2.
- NodeJS packages can be checked in this file.
How does it work after completion?
- An author goes to the WP admin page of Math2IT to create/modify their posts there. They can use any of the supported blocks (both WP standard blocks and custom blocks). They save their work.
- A pipeline detects the changes from Wordpress and rebuilds the Math2IT Gatsby site via GraphQL and publishes the new version to the web.
- The changes are updated and viewers can see the updates.
Why Wordpress + Gatsby + Tailwind CSS?
- Choose Wordpress: because of its flexible WYSIWYG block editor (Gutenberg).
- Choose Gatsby: it renders exactly what WP gives (thanks to WPGraphQL) + I feel that the site is very fast both in development mode and in production mode.
- Choose Tailwind CSS: to get one comprehensive style for the whole site. Change one for all.
The current version of Math2IT is 100% based on Wordpress. WP is really powerful and includes all the processes needed to run your website. However, the speed of a WP site is not that impressive if we compare it with static sites. One option is to use a static site to run your website at 100% (like my personal site, which is powered by 11ty, another SSG). This option has a weakness: you have to use Markdown files, and it's hard to find a WYSIWYG editor for non-technical people to edit the content. With the growth of technologies, especially in web development, we have the ability to create an A-Z like WP, but the published website is run through an SSG engine. It is fast like SSG but powerful like a CMS. However, it requires a lot of efforts so that we can create a working environment for both technical and non-technical users.
I chose Wordpress for the current version of Math2IT because it supports many blocks in its editor (and we can install/create many custom blocks ourselves if we want). Moreover, with the Advanced Custom Fields (ACF) plugin, we can create any kind of content for our blog. You can check out a WP theme I created for Math2IT here (I tested that it is compatible with WP version 5 and 6).
Thanks to GraphQL and WPGraphQL, we can transfer the data from Wordpress to a Gatsby site.
And why Gatsby? Because I feel the site is very fast in both production and development (unlike 11ty or Jekyll which take more time to build your site each time you make changes, that's my personal experience).
For example, to display 2 columns in a post, we can use the Shortcodes Ultimate plugin to create a block in WP and then get the same HTML result in Gatsby as follows,
<div class="su-row">
  <div class="su-column su-column-size-1-2">
    Column 1.
  </div>
  <div class="su-column su-column-size-1-2">
    Column 2.
  </div>
</div>
If you ask me why I use 11ty for my personal website instead of Gatsby, it's because of 11ty's flexibility when writing posts in Markdown style. Especially for images, I can insert any images with any custom classes in 11ty (thanks to the numerous plugins from markdown-it, a Markdown engine that 11ty uses to convert Markdown files into HTML files). In this post, you'll find all kinds of blocks in a post I create using 11ty. They are all written in a "Markdown style".
For example, to insert a custom size image into a markdown file,
{:.img-30}
_An image with 30% width of the website!_So why not use 11ty for Math2IT in conjunction with Wordpress? That's because using WpGraphQL, all HTML tags and their classes are parsed into Gatsby before the building process. So we can add custom CSS to "display" this HTML content in the final result of Gatsby. We can do the same with 11ty (I think), but again, the advantage of Gatsby attracts me more. In other words: If I can make more customizations to the Markdown files in Gatsby (as with markdown-it in 11ty), I can use Gatsby instead of 11ty for my personal website.
Finally, I choose Tailwind CSS for the styles because of its predefined classes and also because of its cleaning process after creation. With the predefined classes (you can also create your own if you want), we have a comprehensive style for the entire site. You do not want the spacing between blocks to be small in this place and slightly larger in another, just because you manually set them in 2 different classes. A side reason is that Tailwind CSS is very popular (their marketing results), I want to learn it too. I am starting to get FOMO sick.
From this part on I will write the tuts short and sweet (with links and only the most important parts with their ideas), otherwise the post will be very long and cumbersome.
Create a local copy of Math2IT
For development purposes, we need a WP version of Math2IT that runs locally (even without an internet connection).
Create a backup of the site on the Math2IT Admin daskboard using the All-in-One WP Migration plugin or create a manual backup from a hosting server.
Export the site without spam comments, post revisions, inactive themes and cache and then download this backup as a .wpress file, say math2it.wpress.
Install NodeJS (you'll need it later anyway) and run below command,
npx wpress-extract math2it.wpressYou will have an extracted folder called math2it/. There should be a <filename>.sql file in there.
Go to the hosting panel, select your website (if you have multiple websites) and then select Backups > Select Files backups > Choose a date > Next step > Select your site > Download all files.
Unzip the dowloaded .zip file to a folder, say math2it/.
Do the same for the database file: Backups > Select Database backups > .... to get a <filename>.sql file.
Another option is BackWPup. It works perfectly if you use it to backup your site for Local but the free version doesn't support restore. Just use it to backup to a .zip file and then use it directly in Local.
Note that, the content of the math2it/ folder will vary depending on the method you choose. You must arrange the files and folders in it in the following structure,
|-- math2it # will be zipped to math2it.zip
    |-- files
    |   |-- wp-content
    |       |-- ...
    |       |-- plugins
    |       |-- themes
    |       |   |-- math2itwp
    |       |-- uploads
    |       |-- ...
    |
    |-- math2it.sql # database
Zip math2it/ in to math2it.zip.
Download and install Local by FLywheel. Drag math2it.zip to Local and name the site as "math2it", it should have a domain like math2it.local.
For example, when I install Local, the default version is WP 6 but the backup I created is based on WP version 5.
In Local, click Open Site Shell and run the following command,
wp core update --version='5.8.4' --forceThen restart the site.
(Optional) On macOS, you must manually trust the math2it.local domain in Keychain Access for the https to work. Read this article for more.
👉 Live site: https://math2it.local
In Local, if you have problems launching a website, carefully check the PHP version and the WP version. They are important!
If you are have problems with Local, you can try to run your site with Docker. The idea is the same as using Local, you do not have to manually install everything from WAMP to run your site locally. I have a note on this.
Install the WPGraphQL & WPGatsby & WPGraphQL for Advanced Custom Fields plugins. Open WPGraphQL and note the endpoint, it should be http://math2it.local/graphql.
Run Local using script
Normally you have to open Local by clicking on the app icon and waiting for it to open. Then you also need to launch the website manually. If you want to integrate the process of running Local and then launch the Gatsby website, you can use local-cli.
npm install -g @getflywheel/local-cli#!/bin/bash
echo "🔪 Kill port 4000"
kill $(lsof -t -i:4000)
echo "👉 Kill the old screen session name 'wp-local'"
screen -X -S wp-local quit
screen -S 'wp-local' -dm bash -c '/Applications/Local.app/Contents/MacOS/Local; exec sh'
echo "👉 Local starts running (but not completely) and the screen is detached!"
while ! nmap localhost | grep '4000'; do
echo "🚧 Local is not yet listening on port 4000"
echo "🔄 Wait for 3s for the next check!"
sleep 3
if netstat -tna | grep '4000'; then
echo "🥳 Port 4000 is already open!"
echo "👉 Start Math2IT local wordpress site..."
local-cli start-site `local-cli list-sites | grep -iF 'math2it' | cut -c3-11`
echo "👉 math2it.local is running"
echo "\n"
echo "🚀 Starting Gatsby develop..."
# exit 1
fi
doneInstall Gatsby
👉 The official tutorial.
👉 Note: all Gatsby notes.
Make sure you already have NodeJS installed and then install the Gasby CLI from,
npm install -g gatsby-cli
gatsby --version # Check version
Then run this,
gatsby new✔ What would you like to call your site?
· math2it
✔ What would you like to name the folder where your site will be created?
· math2it
✔ Will you be using JavaScript or TypeScript?
· TypeScript
✔ Will you be using a CMS?
· WordPress
✔ Would you like to install a styling system?
· Sass
✔ Would you like to install additional features with other plugins?
· Add the Google Analytics tracking script
· Add responsive images
· Add an automatic sitemap
· Generate a manifest file👉 Good to know: TypeScript and Gatsby (official doc).
If you already have a folder and want to create something like above? Create a folder test/ and perform gatsby new in it. Then copy the entire contents of test/math2it/ except for the node_modules and public folders into the folder you've created and run npm i again.
To serve the site after the installation,
npm run develop # a shortcode for "gatsby develop", check it in package.jsonLive site (it's still the default site, there are no posts from Wordpress displayed, although they are fetched during the building process): http://localhost:8000/
GraphiQL (an in-browser IDE, to explore your site's data and schema): http://localhost:8000/___graphql
A sample queryYou can use the following query to see the titles of all posts
query MyQuery {
  allWpPost {
    nodes {
      title
    }
  }
}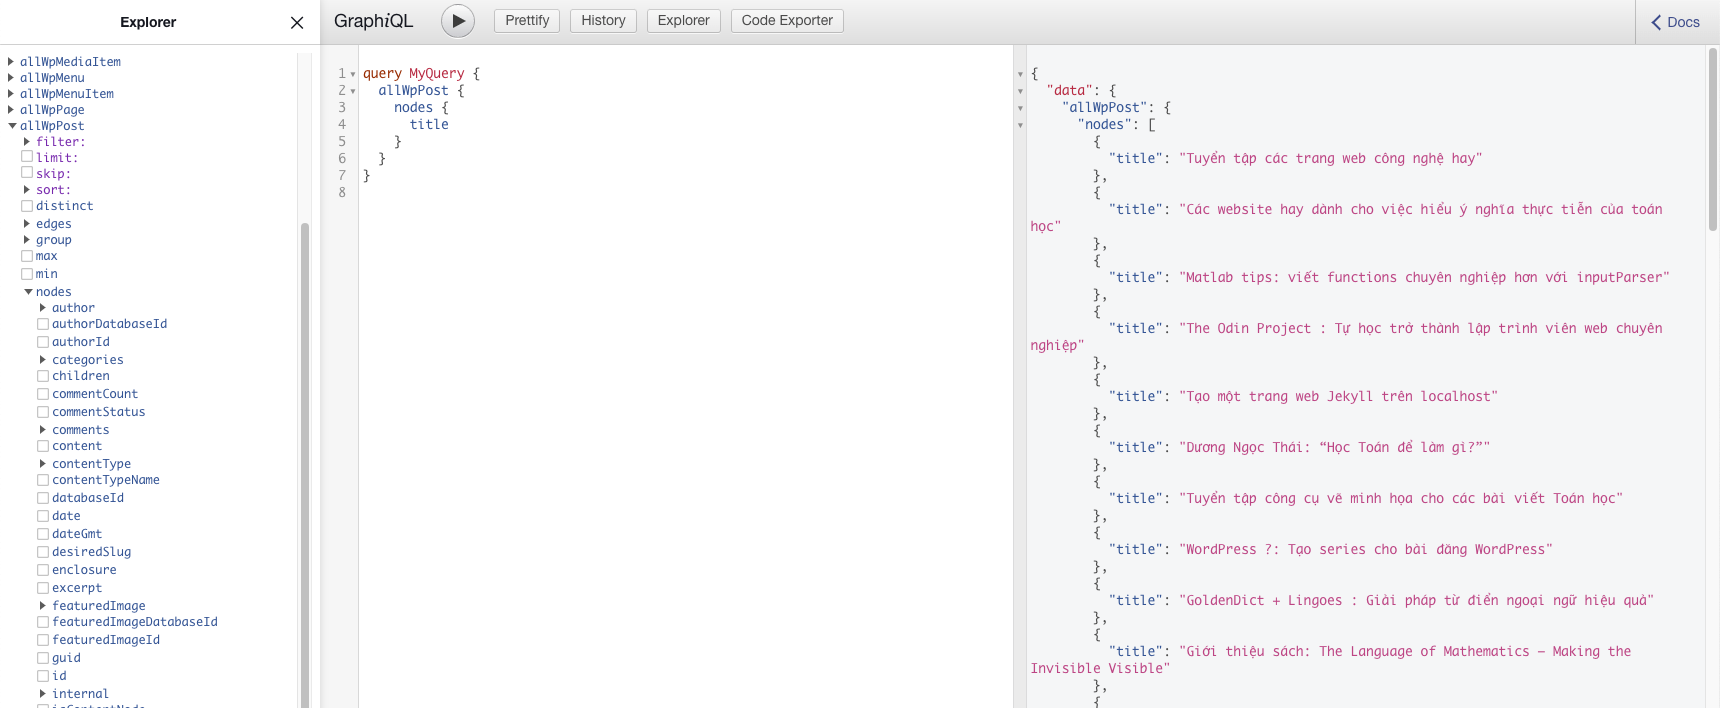
The user interface of GraphiQL.
You must run the WP site in Local before running npm run develop!
WPGraphQL for Advanced Custom Fields
To query custom fields created by ACF from GraphiQL, follow these official instructions.
If you change the data source in ACF, for example in the "GraphQL Types to Show the Field Group On" field, you may need to run gatsby clean && gatsby develop for the http://localhost:8000/___graphql site to apply the changes. One tip: You can check the changes first in WP Admin > GraphQL > GraphiQL IDE to see if the changes work. If everything is OK you can run gatsby clean && gatsby develop!
If you have problems with "DUPLICATE_FIELD" in the query of WP Admin's GraphiQL IDE (if you have "Enable GraphQL Debug Mode" in WP Admin > GraphQL > Settings), it means that there are duplicate names of fields or field groups checked in "GraphQL Types to Show the Field Group On".
ESLint & VSCode & Prettier
To work better, we should set up VSCode and our project to work with ESLint and Prettier. ESLint helps you to detect the problems in your codes in real time. Prettier helps you to put your codes in a good format.
We need all of them installed and work together because VSCode need some rules to detect the problems (thanks to ESLint), it also needs a tool to help us correct the problems (thanks to Prettier). To do these, we need to integrate all together by ESLint settings in the settings of the workspace of VSCode, we need also Prettier extension installed and also its setting file. Lack one of these 3, the error detector will be not working!
How to know if it works? If the text of tabs in VSCodes turns red or yellow when errors occur in a file, the error detector is working. You can use the keyboard shortcuts of VSCode to quickly format the document according to the rules of Prettier and ESLint.
VSCode
In VSCode, install following extensions: Prettier, ESLint, Auto Import, Auto Close Tag, Auto Rename Tag, (Github Copilot, optional because it's paid), GraphQL, Highlight Matching Tag, Tailwind CSS IntelliSense.
Do not worry if there are some who do not work yet!
{
  "folders": [
    {
      "path": "../MATH2IT/math2it-egg"
    }
  ],
  "settings": {
    "editor.defaultFormatter": "esbenp.prettier-vscode",
    "editor.tabSize": 2,
    // "editor.formatOnSave": true,
    "[javascript]": {
      "editor.defaultFormatter": "esbenp.prettier-vscode",
      "editor.formatOnSave": false
    },
    "[javascriptreact]": {
      "editor.defaultFormatter": "esbenp.prettier-vscode",
      "editor.formatOnSave": false
    },
    "[typescript]": {
      "editor.defaultFormatter": "esbenp.prettier-vscode",
      "editor.formatOnSave": false
    },
    "[typescriptreact]": {
      "editor.defaultFormatter": "esbenp.prettier-vscode",
      "editor.formatOnSave": false
    },
    "[ignore]": {
      "editor.defaultFormatter": "foxundermoon.shell-format"
    },
    "eslint.validate": [
      "javascript",
      "javascriptreact",
      "typescript",
      "typescriptreact"
    ],
    "[shellscript]": {
      "editor.defaultFormatter": "foxundermoon.shell-format"
    },
    "css.validate": false, // used for @tailwindcss
    "scss.validate": false, // used for @tailwindcss,
    "typescript.preferences.quoteStyle": "single",
    "[xml]": {
      "editor.defaultFormatter": "redhat.vscode-xml"
    }
  }
}
ESLint
👉 Official doc: Getting Started with ESLint.
npm init @eslint/config✔ How would you like to use ESLint? · problems
✔ What type of modules does your project use? · esm
✔ Which framework does your project use? · react
✔ Does your project use TypeScript? · Yes
✔ Where does your code run? · browser
✔ What format do you want your config file to be in? · JavaScript
---
✔ Would you like to install them now? · Yes
✔ Which package manager do you want to use? · npmAnd then,
npm i -D prettier eslint-plugin-prettier eslint-config-react-appOpen .eslintrc.js file and, add 'react-app' to extends, 'prettier' to plugins and add following rules (more rules)
/*
More: https://eslint.org/docs/rules/
0: "off",
1: "warn",
2: "error",
*/
rules: {
  "import/no-unresolved": 0,
  "jsx-a11y/accessible-emoji": 0,
  "jsx-a11y/iframe-has-title": 0,
  "no-const-assign": 1,
  "no-extra-boolean-cast": 1,
  "no-irregular-whitespace": 1,
  "no-unused-vars": 1,
  "prettier/prettier": 1,
  quotes: [1, "single"],
  "spaced-comment": [1, "always"],
}
Prettier
Create .prettierrc in the root folder with following content
{
  "arrowParens": "avoid",
  "semi": false,
  "singleQuote": true,
  "tabWidth": 2,
  "bracketSameLine": false,
  "printWidth": 80
}
And .prettierignore with
.cache
package-lock.json
public
Types with Typescript
Typescript with types helps us to know exactly which types of a variable occur in our codes. In conjunction with VSCode Intellisense, it can give us suggestions for fields when coding. It also helps us minimize problems with types and syntax. Learn more.
For types with GraphQL, read this official doc: GraphQL Typegen.
const data: Queries.TypeGenWpMenuQuery = useStaticQuery(graphql`
  query TypeGenWpMenu {
    wpMenu(name: { eq: "indexMenu" }) {
      menuItems {
        nodes {
          ...
        }
      }
    }
  }
`);
Look at the usage (data: Queries.TypeGenWpMenuQuery), if you define any graphql query QueryABC {}, TypeGen will automatically generate a type for you as Queries.QueryABCQuery (we need "Query" at the end of the QueryABC) after saving the file. In order for TypeGen to recognize the query in a file, you must include that file in the "include" of tsconfig.json.
For problems with non-nullable types, see this section of the article above. This also gives you the ability to explicitly define types in your website or source code plugin.
If you add some custom types, you may need to reload the VSCode workspace for the changes to take effect.
If you have "types" problems with importing images (.svg, .png or .webp), you can create a file src/custom.d.ts with the following content and include this file in the include of tsconfig.json.
declare module '*.svg' {
  import * as React from 'react'
  export const ReactComponent: React.FunctionComponent<
    React.SVGProps<SVGSVGElement> & { title?: string }
  >
  const src: string
  export default src
}

declare module '*.webp'

declare module '*.png'
Types for gatsby-node.ts?
If you want to add types for variables in gatsby-node.ts, here is an example. It's a bit complicated and I think we should not do it!
Setting up .env
There is some sensitive information you need to hide from the public (e.g. passwords, tokens, private endpoints,...). In NodeJS, .env helps us to hide them.
👉 Note: Using .env file in a Node.js project
npm i dotenvCreate .env.development
SITE_URL = 'http://localhost:8080/'
GRAPHQL_ENDPOINT_URL = "http://math2it.local/graphql"
Gatsby requires that we use the name of the file as .env.development and .env.production for development and production respectively.
Then open gatsby-config.ts,
import type { GatsbyConfig } from 'gatsby'

// YOU HAVE TO PUT THESE
import * as dotenv from 'dotenv'
dotenv.config({ path: __dirname + `/.env.${process.env.NODE_ENV}` })

// Use
const config: GatsbyConfig = {
  siteMetadata: {
    title: 'Math2IT',
    siteUrl: process.env.SITE_URL,
  },
  plugins: [
    {
      resolve: 'gatsby-source-wordpress',
      options: {
        url: process.env.GRAPHQL_ENDPOINT_URL,
      },
    },
  ]
}
Using SCSS
Create src/styles/main.scss and put all of your SCSS codes there.
In the base layout, put this
import '../styles/main.scss'If you follow the steps in this section, you do not need to install anything else. Otherwise, you may need to install npm i sass gatsby-plugin-sass.
Setting up Tailwind CSS
👉 Official doc: Install Tailwind CSS with Gatsby
Just follow the official guide. If you have some self-defined classes that cannot be scanned by the tailwind engine, you can put them in a "safe" file, e.g. safelist.txt, and put it in src/styles/safelist.txt and then in tailwind.config.js,
module.exports = {
  content: [
    // ...
    './src/styles/safelist.txt'
  ]
}
# safelist.txt
bg-[#3d78b5]
bg-[#44af36]Don't forget to restart the server to see the changes.
Install Tailwind's plugins: @tailwindcss/typography, @headlessui/react.
Structure your site
From this section on, we will start customizing the site template to ressemble (or slightly improve upon) the current version (based on the Wordpress theme engine).

We will create the same style as this with Gatsby.
The structure and theme of the website will vary depending on your taste. For my choice, I divide the structure into layouts, templates and components,
layouts: usually the blueprint that does not contain GraphQL statements. For example,base.tsx,page.tsx,taxonomy.tsx(a blueprint for all categories, tags).templates: "theme" for more specific types that usually contain GraphQL statements. For example,category.tsx,post.tsx,author.tsx,tag.tsx.components: contains components of the theme likefooter.tsx,navigation.tsx,pagination.tsx,...
💬 Comments